Are you concerned about your online privacy and security? With the increasing number of cyber threats, it’s essential to take measures to protect your personal information while browsing the internet. One effective way to safeguard your online presence is by using a VPN (Virtual Private Network). In this article, we will provide you with a step-by-step guide on how to download, install, and set up the Surfshark VPN Android app. Let’s get started!
Introduction
In this digital age, protecting your online privacy is of utmost importance. A VPN encrypts your internet connection, making it secure and anonymous. Surfshark VPN is a highly reputable and feature-rich VPN service provider that offers exceptional protection and anonymity. In the following sections, we will guide you through the process of downloading, installing, and setting up the Surfshark VPN Android app.
Why Choose Surfshark VPN?
Before we delve into the installation process, let’s explore some key reasons why Surfshark VPN stands out from the competition:
- Strict No-logs Policy: Surfshark VPN adheres to a strict no-logs policy, ensuring that your online activities remain private and anonymous.
- Unlimited Simultaneous Connections: With Surfshark VPN, you can protect multiple devices simultaneously, providing comprehensive security for your entire digital ecosystem.
- Fast and Reliable Servers: Surfshark VPN boasts a vast network of high-speed servers spread across the globe, ensuring optimal performance and uninterrupted browsing.
- Multiplatform Support: Whether you’re using Android, iOS, Windows, macOS, or any other platform, Surfshark VPN offers extensive compatibility, allowing you to protect all your devices.
Now that we understand the advantages of Surfshark VPN let’s proceed with the installation process.
Downloading the Surfshark VPN Android App
To get started, follow these steps to download the Surfshark VPN Android app:
- Open the Google Play Store on your Android device.
- Search for “Surfshark VPN” in the search bar.
- Locate the official Surfshark VPN app and tap on it.
- Click on the “Install” button.
- Wait for the installation process to complete.
Installing the Surfshark VPN Android App
Once the download is finished, you need to install the Surfshark VPN Android app. Here’s what you need to do:
- Open the Surfshark VPN app from your app drawer.
- Grant the necessary permissions requested by the app.
- Tap on the “Install” button to initiate the installation process.
- Wait for the installation to complete.
Setting Up Surfshark VPN on Android
After installing the app, it’s time to set up your Surfshark VPN account:
- Open the Surfshark VPN app.
- Tap on the “Create account” or “Sign up” button.
- Enter your email address and choose a secure password.
- Complete the registration process by following the on-screen instructions.
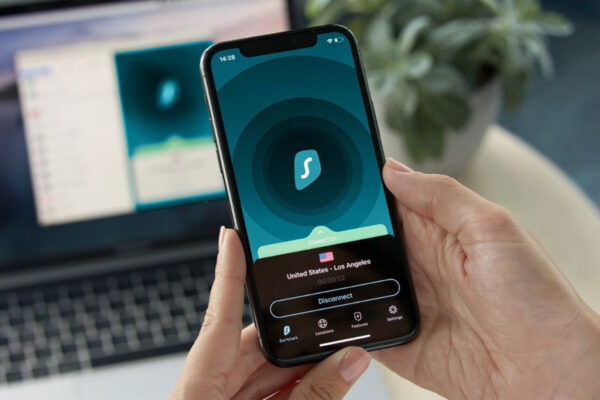
Connecting to a VPN Server
Now that you have set up your Surfshark VPN account, let’s connect to a VPN server:
- Launch the Surfshark VPN app on your Android device.
- Enter your login credentials (email address and password).
- Tap on the “Connect” button to establish a VPN connection.
- Surfshark VPN will automatically connect you to the fastest server available.
Choosing the Optimal VPN Protocol
Surfshark VPN offers various VPN protocols to optimize your browsing experience. Here’s how to choose the ideal protocol:
- Open the Surfshark VPN app.
- Tap on the “Settings” icon.
- Navigate to the “Protocol” or “VPN Protocol” section.
- Select your preferred protocol (e.g., OpenVPN, IKEv2, WireGuard).
Configuring Advanced Settings
Surfshark VPN provides advanced settings to customize your VPN experience. Follow these steps to configure the settings:
- Open the Surfshark VPN app.
- Tap on the “Settings” icon.
- Explore the available options, such as Kill Switch, CleanWeb, and MultiHop.
- Customize the settings according to your preferences.
Ensuring Security and Privacy
To ensure maximum security and privacy, consider the following tips when using Surfshark VPN:
- Enable the Kill Switch feature to instantly terminate your internet connection if the VPN connection drops.
- Utilize the CleanWeb feature to block ads, trackers, and malware-infected websites.
- Activate the MultiHop feature to route your internet traffic through multiple VPN servers, further enhancing your anonymity.
Troubleshooting Common Issues
Encountering issues while using Surfshark VPN? Here are some common problems and their solutions:
- Slow Connection: Try connecting to a different VPN server or switch to a different VPN protocol.
- Unable to Connect: Ensure you have a stable internet connection and verify your login credentials.
- App Crashes: Update the Surfshark VPN app to the latest version or reinstall it to resolve any potential conflicts.
Conclusion
In conclusion, downloading, installing, and setting up the Surfshark VPN Android app is a straightforward process. By following the steps outlined in this guide, you can enjoy enhanced online security, privacy, and freedom while browsing the internet on your Android device.
FAQs
- Is Surfshark VPN free?
No, Surfshark VPN is a premium VPN service that offers various subscription plans.
- Can I use Surfshark VPN on multiple devices simultaneously?
Yes, Surfshark VPN allows unlimited simultaneous connections on a single account.
- Does Surfshark VPN keep logs of my online activities?
No, Surfshark VPN has a strict no-logs policy, ensuring your online activities remain private.
- Can I use Surfshark VPN to access geo-restricted content?
Yes, Surfshark VPN enables you to bypass geo-restrictions and access content from anywhere in the world.
- What if I need assistance with Surfshark VPN?
Surfshark VPN provides 24/7 customer support to help you with any issues or queries you may have.